
Saving Projects from 3Ds Max
Best practices for exporting your 3D project correctly for multi-PC rendering. Learn how to prepare and save your 3Ds Max projects to ensure smooth distributed rendering across your network.
After initial setup, open 3ds max and you should see Corefinder icon in the toolbar.
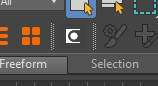
3ds Max icon in the toolbar
If you can not see the icon go to customize→toolbars, search for renderfix make new toolbar and drag drop Corefinder to toolbar. Button should appear.
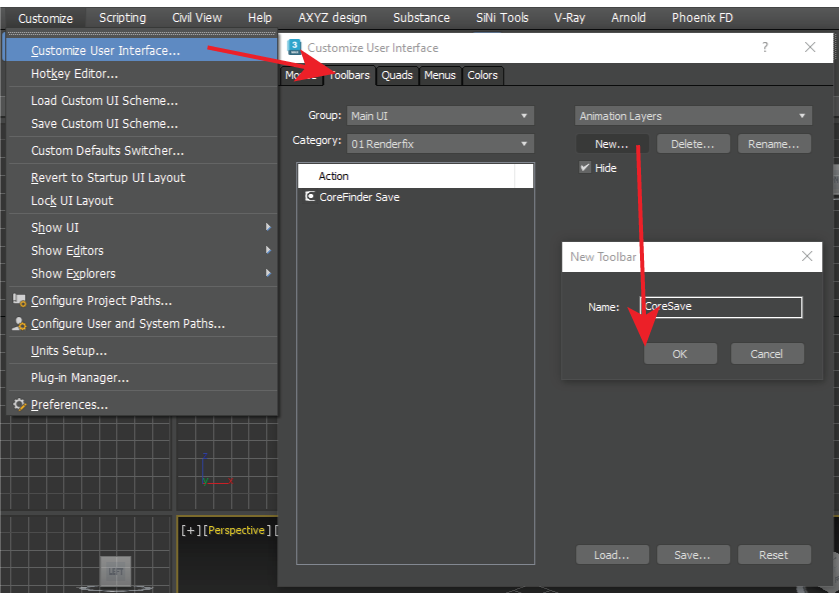
Customize toolbar in 3ds Max
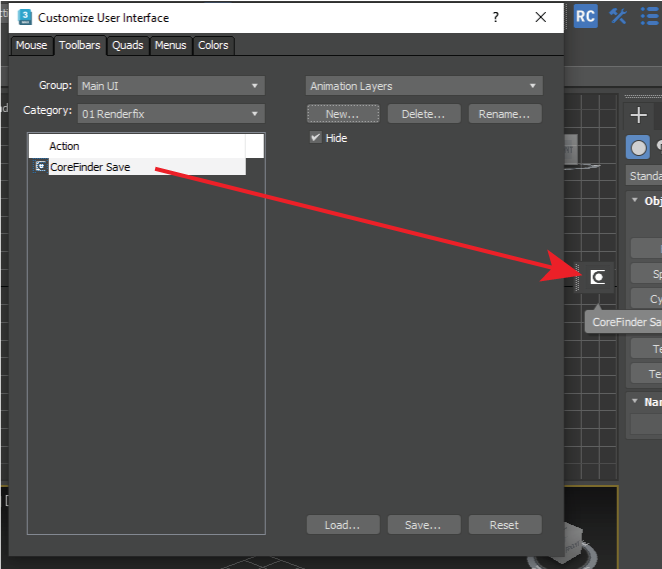
Adding CoreFinder button to toolbar
If this will not work please contact the support.
After that the button will work only on supported renderer scenes (Corona and V-Ray).
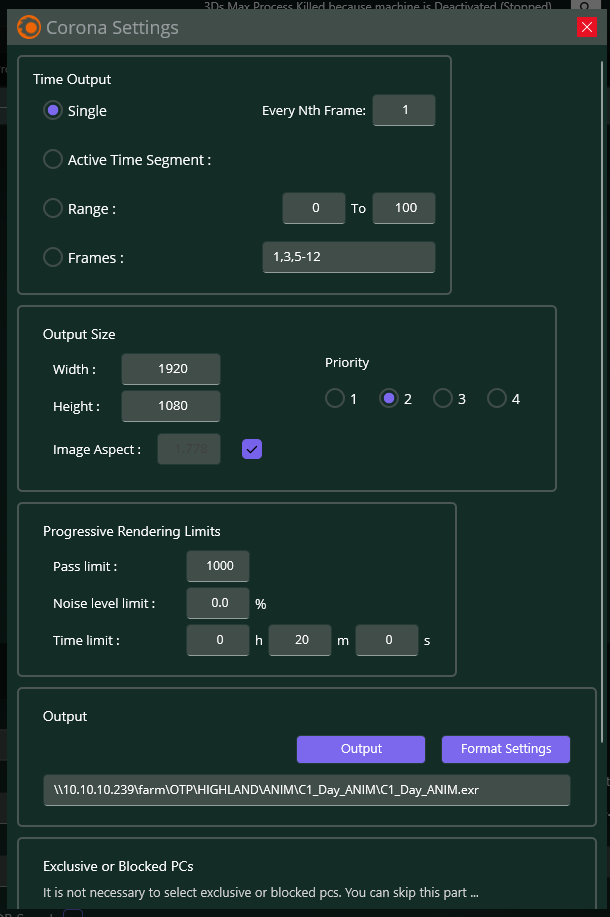
For example you can open a scene rendered with Corona or V-Ray. Push the button and you will be prompted with a dialog where you must set the parameters on which you want your scene to be rendered.
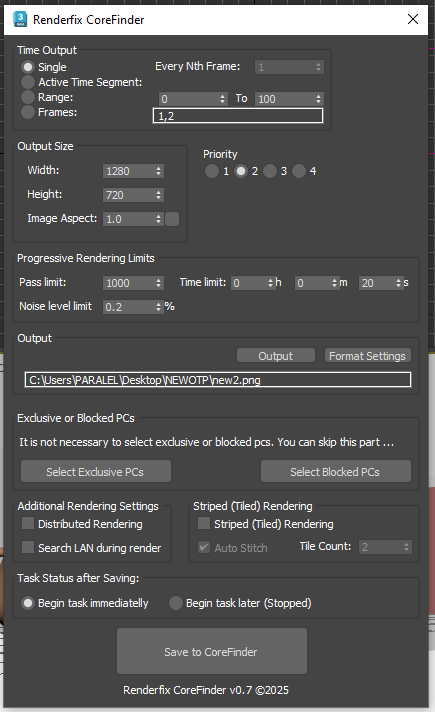
Corona Save Dialog
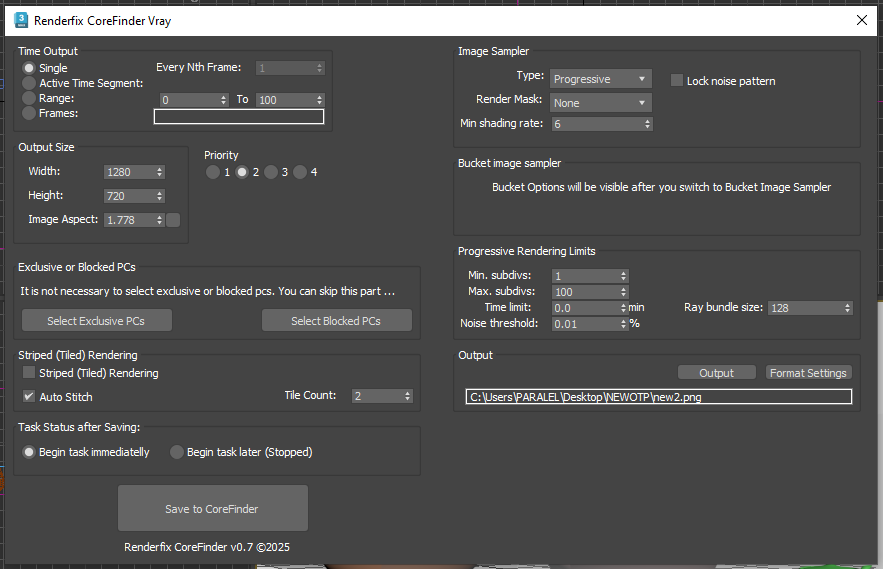
V-Ray Save Dialog
Exclusive or Blocked PCs:
- Exclusive PCs: Only selected PCs here will render your task.
- Blocked PCs: Selected PCs here will not render your task.
Currently Distributed Rendering is only supported on 3Ds Max Corona.
Video Tutorial: Corona Distributed Rendering
Video tutorial on Corona Distributed Rendering with CoreFinder
Striped Tiled Rendering:
If you have huge image to render, this is the best option to distribute one image to multiple pcs, one image will be split into parts and at the end they will be stitched together automatically. You will have to wait +-2 minute at the end of the last part of image to be stitched.
Video Tutorial: Striped Tiled Rendering
Video tutorial on Striped Tiled Rendering in CoreFinder
Task Status after Saving:
If you leave it default value: Begin task immediately, task will be deployed as PENDING, and will immediately start rendering if there is free pc.
If you choose: Begin task later (Stopped), task will be deployed as STOPPED, and will not start rendering until you resume it.
PS: MOST OF THE OTHER SETTINGS HERE ARE 3DS MAX SETTINGS YOU ENCOUNTER REGULARLY.
This parameters will not be changed in your original scene, but will be used in court finder rendering task.
Now you can open up CoreFinder, and you must see your saved task. The task will be automatically assigned to the machine and if there are available machines it will start rendering immediately.
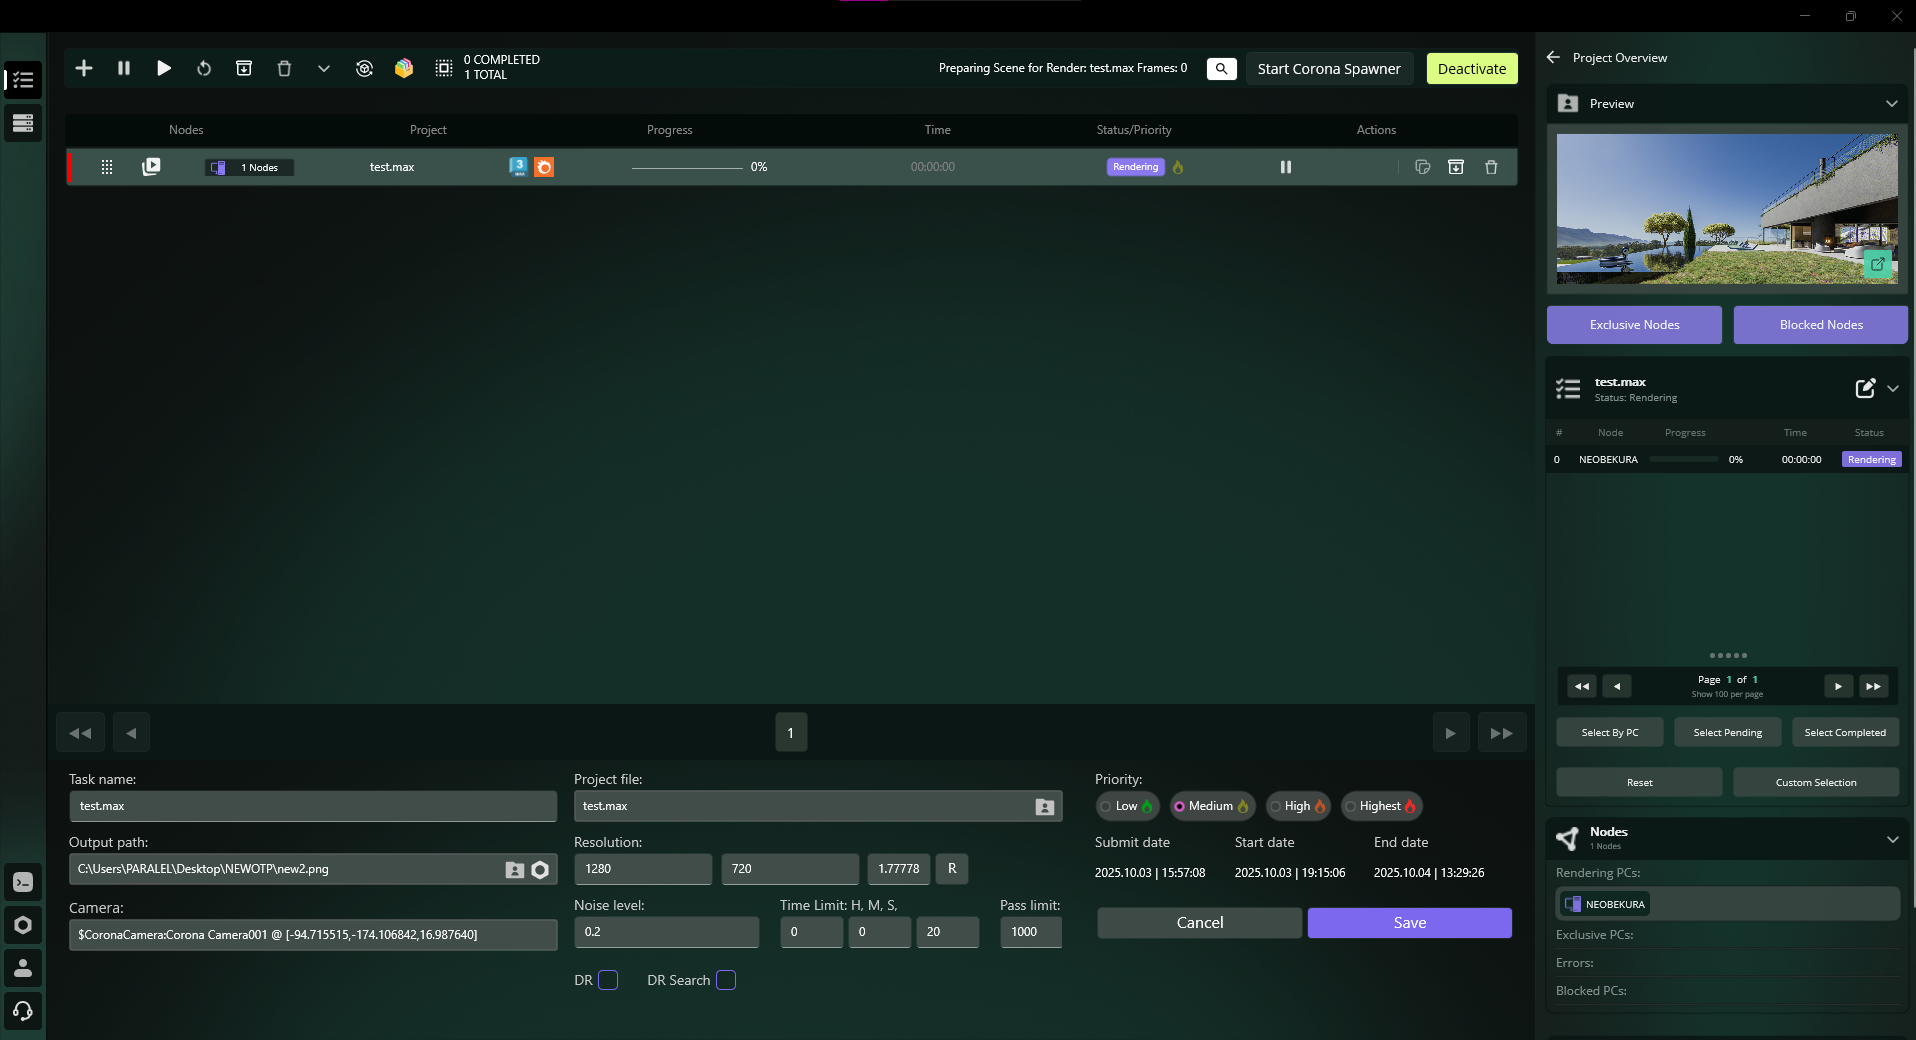
CoreFinder Task
Save Task from CoreFinder without Opening 3Ds Max
CoreFinder allows you to create rendering tasks directly without having to open 3Ds Max. This is especially useful when you want to quickly set up renders from existing scenes.
To create a task directly from CoreFinder:
-
Click on Plus button in the top left corner, Create Task
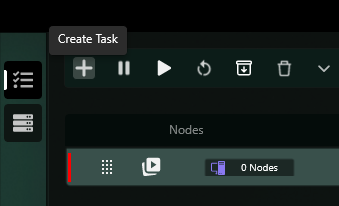
Creating a task directly from CoreFinder
-
Select the .max file you want to render
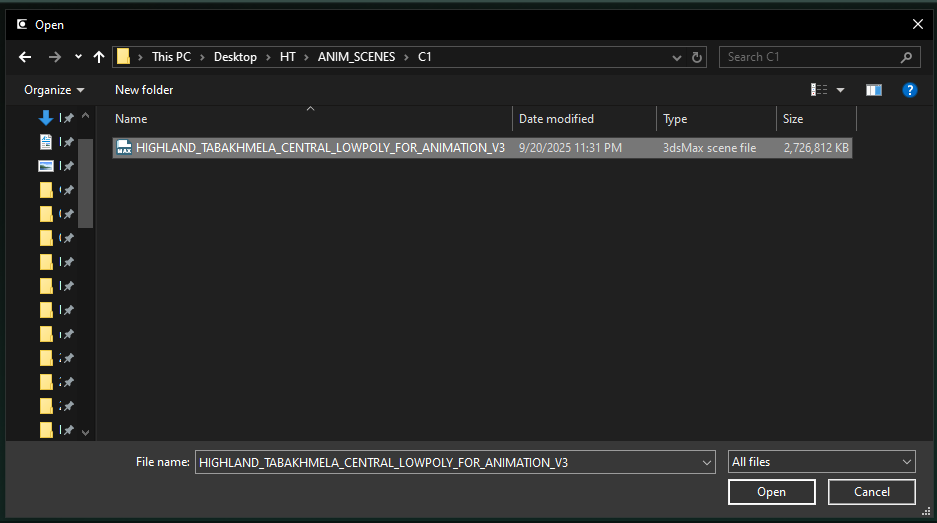
Selecting a .max file for rendering
-
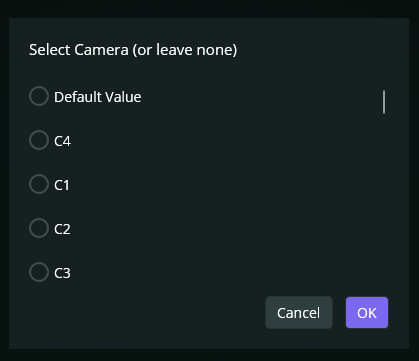
Choose the camera, if you have already set camera in the file and don't want to change select "Default Value"
Selecting camera and render settings
-
Configure the rendering parameters according to your needs, you need to scroll down for Save Button
Setting up rendering parameters (part 1)
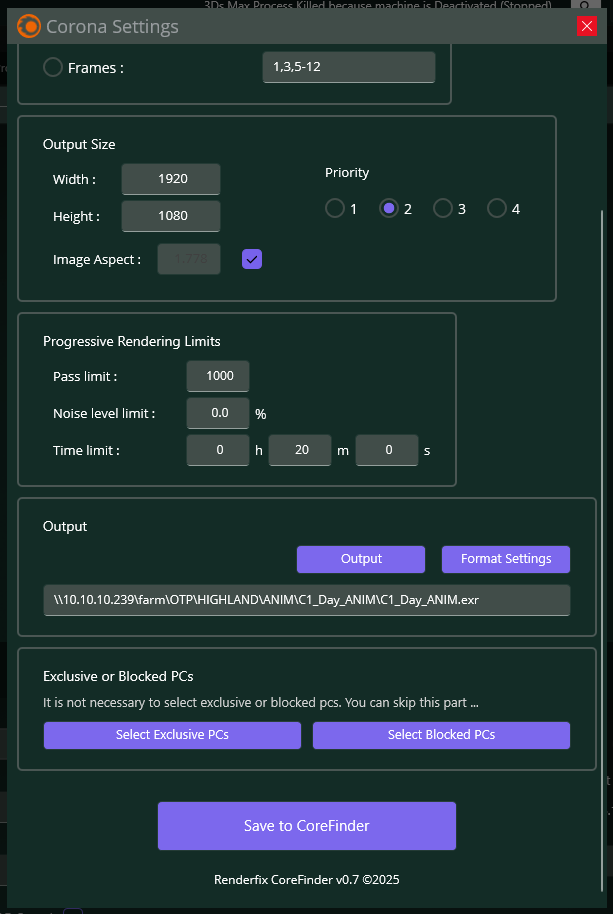
Setting up rendering parameters (part 2)
Quick Task Creation Benefits:
If you have large files, you are saving time by not opening them and deploying directly them to render.
Video Tutorial: Creating Tasks from CoreFinder
Video tutorial on creating tasks directly from CoreFinder
Let's see how we manage renders in next chapter.
Video Tutorial
Watch our detailed video guide on saving and managing projects in CoreFinder